A gable roof is one of the most common and recognizable roof styles, known for its simple triangular shape and strong weather resistance. Many homeowners explore the idea of building a gable roof either to understand the process, assist in a renovation project, or work alongside a skilled team.
In this guide, we break down the basic structure of a gable roof, the planning steps, materials needed, and the general construction process so you know exactly what goes into building one and what to expect during installation.
Understanding the Basics of a Gable Roof
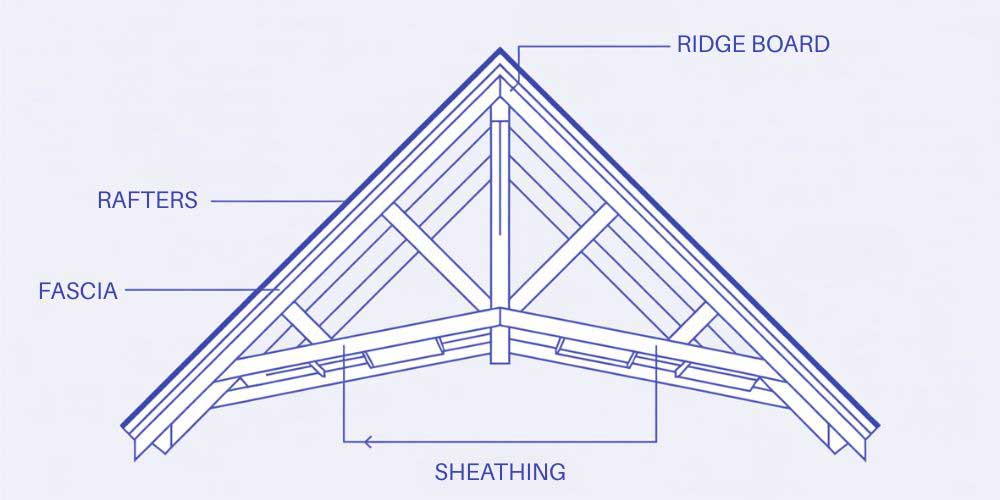
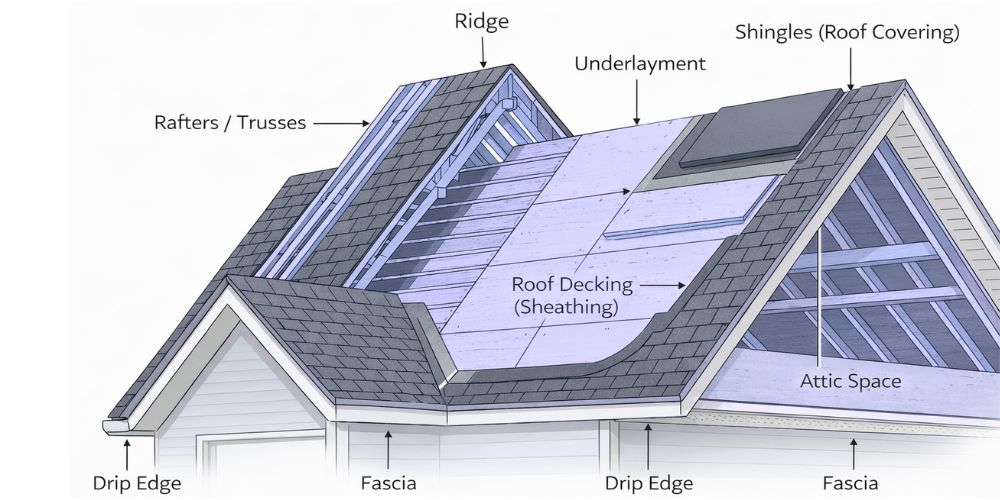
A gable roof is supported by a straightforward but effective framing system designed to distribute weight and handle wind and rain efficiently. The structure includes:
- Ridge Board: The horizontal beam at the peak that anchors the rafters.
- Rafters: Angled supports that form the main framework and determine the roof’s slope.
- Trusses: Prefabricated frames used instead of rafters for faster and stronger installation.
- Fascia: Boards attached to the roof edge that support gutter systems and create a clean finish.
- Roof Sheathing: Plywood or OSB panels installed over the frame to create a solid base for underlayment and shingles.
Planning Your Gable Roof
Planning your gable roof correctly is essential because the measurements and choices you make at this stage affect the entire construction. Here’s what this section covers:
- Home Measurements:
You need to calculate the span (overall width), the run (distance between the wall and ridge), and the pitch (roof angle). - Choosing a Moderate Gable Pitch:
A moderate pitch typically ranges from 6/12 to 10/12, meaning the roof rises 6 to 10 inches for every 12 inches of horizontal distance.
This pitch helps water drain properly and improves performance against wind in most climates. - Local Conditions and Codes:
You must consider weather patterns, snow-load requirements, and any local building regulations that apply to your project. - Permits:
Before starting, check with your local building department to ensure proper permits are obtained.
Materials and Tools Needed
Before starting any framing or installation, gather the right materials and tools. Using good-quality products makes a noticeable difference in the strength and lifespan of your gable roof.
Materials You Will Need
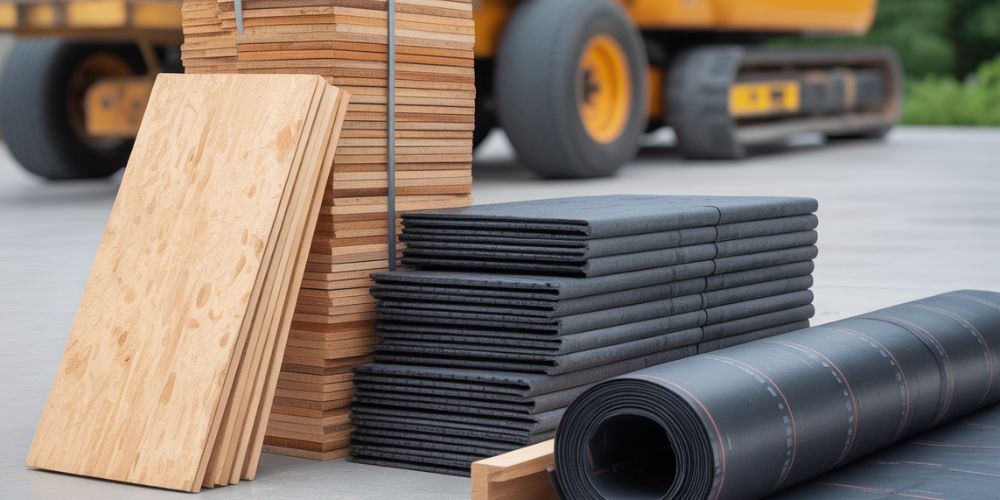
- Lumber for rafters and ridge boards (typically 2×6 or 2×8, depending on your span).
- Roof sheathing (usually plywood).
- Underlayment for weather protection.
- Roofing shingles.
- Roof flashing.
- Roof fasteners
Tools You Will Need

- Hammer.
- Circular saw or miter saw.
- Framing square.
- Level.
- Power nailer.
- Safety gear: a harness, gloves, and a hard hat.
Avoid choosing cheap materials. Higher-quality lumber and shingles directly improve the long-term performance of your gable roof. Since many residential gable roofs rely on durable shingle systems, selecting the right material plays a major role in how well the roof holds up over time.
Step-by-Step Construction Guide
Here’s what the actual building process looks like:
Step 1: Prepare the Base Framing
Make sure your wall plates are level and secure. This foundation is critical—everything depends on it.
Step 2: Install the Ridge Board
The ridge board runs along the peak of the roof and needs to be perfectly positioned. This board ties everything together structurally.
Step 3: Set the Rafters or Trusses
Rafters are cut and installed one at a time and then tied to the ridge board and wall plate. They typically need to be spaced 16 or 24 inches apart. If you’re using pre-made trusses, they go up faster and are often safer for DIYers, but they need proper spacing and bracing, too.
Step 4: Add Roof Sheathing and Underlayment
Once the framing is done, you’ll nail down plywood sheathing across all the rafters. The underlayment goes on top, acting as a water barrier.
Step 5: Complete the Gable Roof Installation
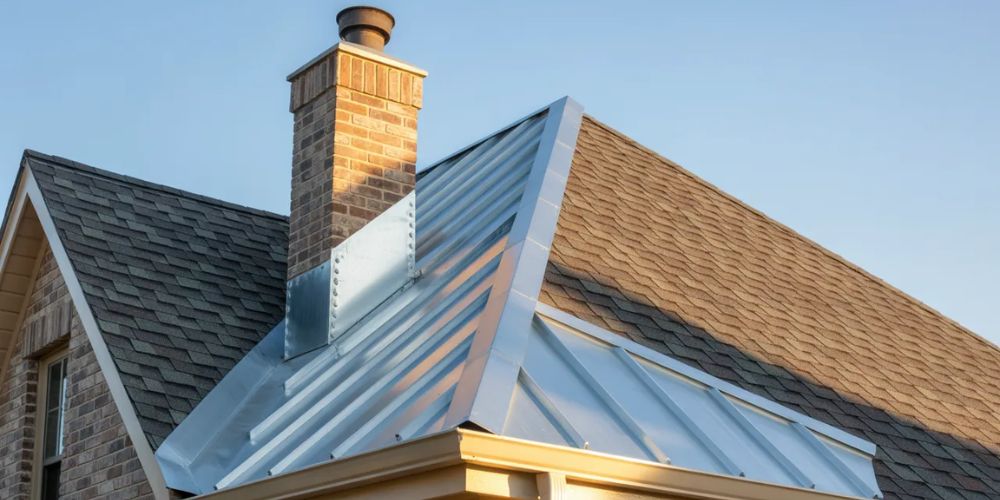
This is where you add your shingles and flashing. Flashing around chimneys, vents, and roof edges prevents leaks.
Common Mistakes to Avoid
- Even seasoned builders may get into trouble when they are not attentive.
- Wrong measurements of the rafters or improper alignment mess everything up.
- Poor framing with gable roofs undermines the entire structure.
- Some homeowners select the wrong pitch that does not suit their climatic conditions, resulting in drainage problems. A better understanding of local roof design factors can help prevent these issues, especially for homes in San Antonio.
- Another huge mistake is omitting underlayment or adequate ventilation. You can save time initially, but you will end up paying in the future because the water will accumulate in your attic.
- The placement of poor ridge boards has an impact on the whole construction of the gable roof, and thus, it takes time to ensure that this is right.
Maintenance Tips for Your Gable Roof
Once your gable roof is installed, regular upkeep is important to keep it performing well.
- Examine your shingles, flashing, and seals at least twice a year.
- Keep the garbage out of the way so it is not pooled up in the water.
- Make sure that you have good ridge vents and ventilation in the attic.
- In case you find leaks, misplaced shingles, or broken flashing, respond immediately.
- For any major repairs or if you want a professional inspection after installation, that’s definitely worth the investment.
Why Hire a Professional Roofing Contractor
Here’s the truth: knowing how to construct a gable roof is one thing, but actually doing it requires great skill, training, and experience. A professional roofing contractor brings the local knowledge needed to handle San Antonio’s weather, wind patterns, and building requirements.
Experienced roofers also have the right tools, safety equipment, and techniques to complete the job efficiently and with far less risk than most homeowners. Their work typically comes with warranties, giving you long-term peace of mind. While professional installation may seem more expensive upfront, you’re paying for quality, safety, and a roof that is built to last.
Also Read About: Gable Roof vs Hip Roof
Conclusion
Understanding how a gable roof is built gives you a clearer picture of the process and what each step involves. Still, proper gable roof construction requires experience, precision, and strict safety measures that most homeowners don’t have.
If you’re thinking about a new roof in San Antonio, Mangold Roofing brings trusted expertise to help make sure the job is done with quality and care.
FAQs
- Are gable roofs easy to build?
Gable roofs look simple, but building one requires accurate measurements and strong framing skills. The steps are straightforward, but proper construction still needs experience and attention to safety. - How do you lay out a gable roof?
Start by marking the rafter or truss layout on the top plates, confirm your measurements, and calculate angles based on your chosen pitch. Good planning keeps the framing square and prevents alignment issues. - How is a gable roof made?
A gable roof is built by installing a ridge board or placing pre-made trusses, securing rafters to the ridge and wall plates, adding sheathing, and finishing with roofing materials like shingles or metal. - Which is stronger — a hip roof or a gable roof?
Hip roofs generally offer better wind resistance because all sides slope down. Gable roofs provide good strength, too, but their flat ends can catch more wind if not framed and braced correctly. - How do you build a gable roof with overhangs?
Overhangs are created by extending rafters past the wall line or using outlookers for support. Proper bracing is important to keep the overhang rigid and aligned. - How do you build a small timber gable roof (like a shed roof)?
For a small shed, you can frame a simple ridge board and rafter system or use lightweight prefabricated trusses. Once set, add sheathing and your chosen roofing material.