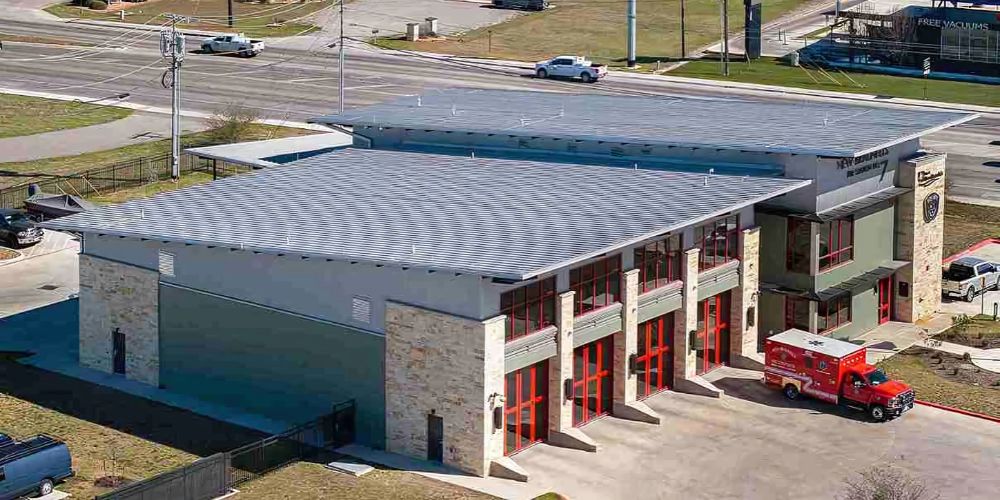
Installing metal roofing is more than simply attaching panels to a roof deck. The installation order, screw placement, flashing details, and underlayment layers all affect how well the roof performs over time.
Many metal roof leaks happen because of small installation mistakes, not because the metal panels fail. Incorrect overlaps, poorly installed flashing, or overdriven screws can allow water to work underneath the system.
This guide covers the full installation sequence from underlayment to ridge cap, including where screws go, how flashing works, and which mistakes cause most leaks.
What to Know Before Installing a Metal Roof
Before installing a metal roof, it is important to understand roof slope requirements, weather conditions, safety concerns, and the type of metal roofing system being used.
A few important things to check before starting:
- Roof decking condition: Damaged or soft decking must be replaced before panels go on
- Minimum roof pitch requirements: Different panel types require different slopes to drain properly
- Proper ventilation: Poor ventilation causes condensation buildup under metal panels
- Local building codes: Some areas require permits or specific installation methods
- Safe weather conditions: Panels should never be installed on wet or icy decking
- Accurate roof measurements: Measurement errors cause panel waste and alignment problems
Understanding the minimum pitch for metal roof systems also matters because different panel types require different slope requirements to drain water properly.
Metal Roof Installation Materials Checklist
Before starting the installation process, gather all required roofing materials and tools.
| Material | Purpose |
|---|---|
| Metal roofing panels | Main roofing surface |
| Synthetic underlayment | Moisture protection |
| Roofing screws with washers | Secure panels to the decking |
| Drip edge | Protect roof edges from water |
| Flashing | Seal roof penetrations and transitions |
| Closure strips | Block wind-driven rain and debris |
| Ridge cap | Finish the roof peak and improve ventilation |
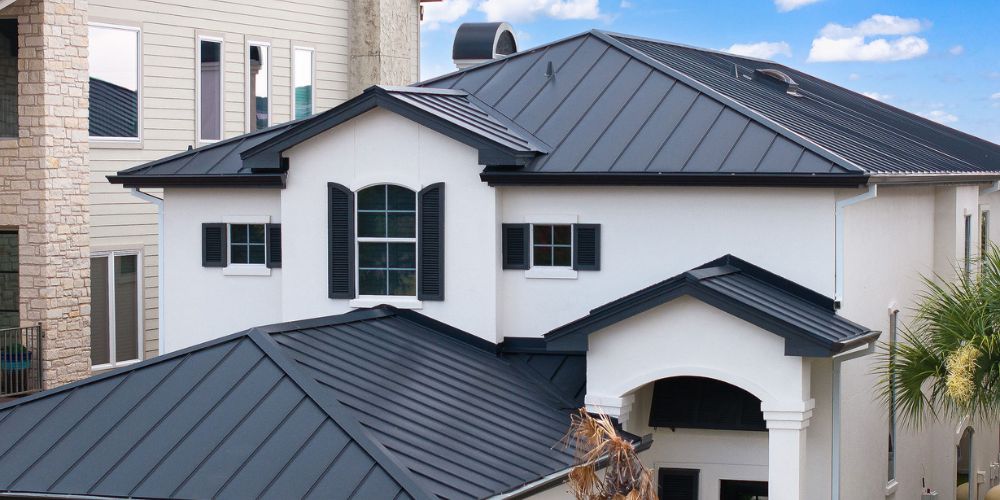
The exact materials and fastening methods may vary depending on whether you are installing corrugated metal roofing or a standing seam metal roof system.
Panel profile, thickness, and fastening methods can affect both installation difficulty and long-term performance. Understanding different metal roofing panel types and choosing the right metal roof gauge helps prevent issues like oil canning, panel movement, and fastener failure over time.
What Goes Under a Metal Roof?
What goes underneath metal roofing is one of the biggest factors affecting roof performance and condensation control.
Most residential metal roof systems include multiple protective layers beneath the metal panels.
Common Layers Under Metal Roofing
| Layer | Purpose |
|---|---|
| Roof decking or plywood | Structural support |
| Underlayment | Moisture barrier |
| Ice and water shield | Extra leak protection in vulnerable areas |
| Battens or air gap system | Ventilation and condensation control |
Synthetic underlayment is commonly used because it handles heat and moisture better than traditional felt paper.
Some roofs also use battens or ventilation systems to create an air gap under a metal roof, which helps reduce condensation buildup beneath the panels.
The roof decking condition matters too. Plywood provides the structural base needed for proper fastener holding and panel stability. A moisture barrier beneath the panels adds another layer of protection against trapped water and long-term decking damage.
Metal Roof Installation Order
The correct installation sequence matters because every layer overlaps the next to direct water safely off the roof.
Standard Metal Roof Installation Order
- Prepare the roof deck
- Install underlayment
- Install drip edge
- Install metal panels
- Fasten panels correctly
- Install flashing around openings
- Install the ridge cap

Step-by-Step Metal Roof Installation Process
Step 1 – Prepare the Roof Deck
The roof deck should be clean, dry, and structurally sound before installation begins.
Check for:
- Rotten decking
- Moisture damage
- Loose fasteners
- Uneven surfaces
- Soft spots
Damaged decking should always be replaced before installing metal roofing panels.
Step 2 – Install Underlayment
Underlayment creates a protective moisture barrier beneath the metal roofing system.
Synthetic underlayment is commonly preferred because it handles heat and moisture better than traditional felt paper.
Proper overlap direction matters because incorrect layering can allow water intrusion during heavy rain or wind-driven storms.
Step 3 – Install Drip Edge
Drip edge protects the roof perimeter by directing water away from the fascia and decking edges.
Proper drip edge installation includes:
- Correct overlap direction
- Tight edge alignment
- Secure fastening
- Proper corner transitions
Improper drip edge installation can allow water to back up underneath the roofing system.
Step 4 – Install Metal Panels
This is one of the most important parts of the installation process.
Panels should remain square and aligned from the beginning because small alignment mistakes become larger across the roof surface.
Key installation considerations include:
- Starting point: Begin at the eave edge and keep the first panel square with the roof edge
- Panel overlap spacing: Overlap each panel according to the manufacturer’s specified distance
- Keeping rows straight: Use a chalk line to maintain alignment across the full roof surface
- Proper fastening alignment: Fasten panels according to the panel system requirements
- Expansion and contraction allowance: Do not over-fasten panel ends to allow thermal movement
Corrugated metal roofing panels and standing seam systems install differently, especially regarding fastening methods and overlaps.
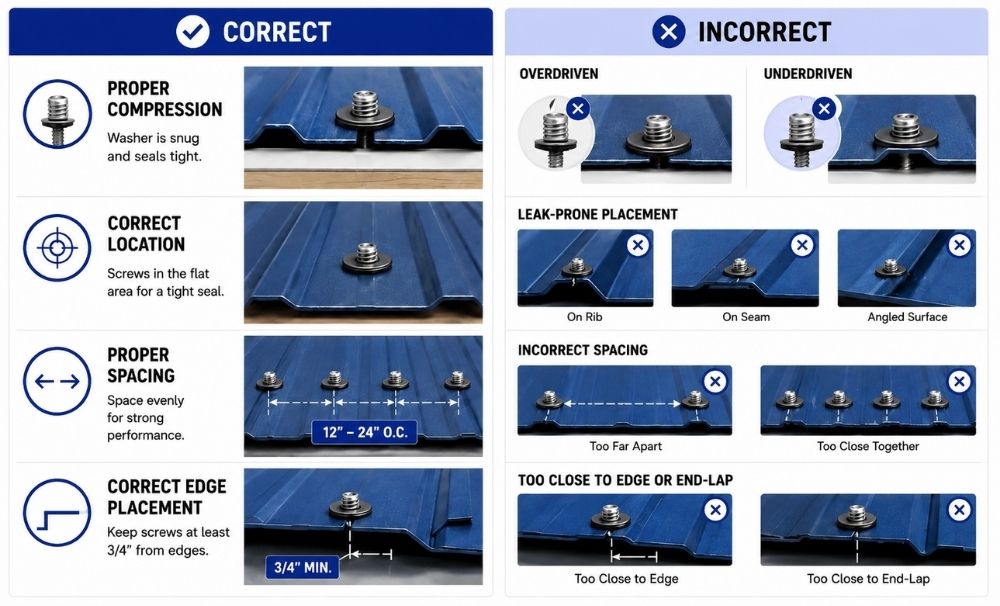
Step 5 – How to Screw Down Metal Roofing Correctly
Incorrect screw placement is one of the most common causes of metal roof leaks.
Many installation problems happen because the screws are:
- Overdriven
- Underdriven
- Misaligned
- Installed in incorrect locations
- Spaced improperly
The washer should compress slightly without being crushed. Over-tightening damages the washer seal, while under-tightening leaves gaps where water can enter.
Some panel systems require screws in the flat areas, while others require fastening along the ribs, depending on the manufacturer’s instructions.
Step 6 – Install Flashing Around Roof Openings
Flashing protects vulnerable roof areas where water commonly enters.
These areas include:
- Chimneys
- Skylights
- Roof valleys
- Plumbing vents
- Wall transitions
Poor flashing installation is one of the most common causes of metal roof leaks. Proper roof flashing helps seal these transition areas and direct water away from openings.
Step 7 – Install Ridge Cap
The ridge cap finishes the roof peak while helping maintain proper ventilation.
Installation should include:
- Closure strips
- Proper overlap
- Weather sealing
- Ventilation gaps where required
Properly installing the ridge cap is essential because incorrect installation can allow wind-driven rain and debris underneath the roof system.
Corrugated vs Standing Seam Metal Roof Installation
| Feature | Corrugated Metal Roofing | Standing Seam Metal Roof |
|---|---|---|
| Fastener Type | Exposed fasteners | Concealed fasteners |
| Installation Difficulty | Easier | More advanced |
| Leak Resistance | Moderate | Higher |
| Maintenance Needs | More frequent fastener checks | Lower maintenance |
| Cost | Lower | Higher |
Standing seam systems typically provide better long-term leak resistance because the fasteners remain hidden beneath the seams.
Can You Install Metal Roofing Over Shingles?
In some situations, metal roofing can be installed over existing shingles, but it depends on local building codes, roof condition, and structural support.
Potential concerns include:
- Trapped moisture
- Uneven roof surfaces
- Hidden decking damage
- Added roof weight
- Ventilation issues
Installing over shingles may save labor costs initially, but underlying roof problems can remain hidden.
Most building codes allow a maximum of two roofing layers on a residential structure.
If the existing shingles are already a second layer, a full tear-off is required before metal installation.
A professional inspection of the decking underneath is strongly recommended before installing over shingles.
Common Metal Roof Installation Mistakes
Some installation mistakes may not cause leaks immediately, but can create problems over time.
Common Mistakes
| Mistake | Possible Problem |
|---|---|
| Incorrect screw placement | Roof leaks |
| Poor flashing installation | Water intrusion |
| Bad panel alignment | Uneven water drainage |
| Missing underlayment | Moisture damage |
| Improper overlaps | Wind-driven rain leaks |
Most long-term metal roof issues are caused by installation errors rather than panel failure. Many of these problems start with small mistakes during panel fastening, overlap spacing, or flashing placement. Understanding common metal roof installation mistakes helps prevent premature leaks and costly repairs.
How Long Does Metal Roof Installation Take?
Installation time depends on roof size, roof complexity, weather conditions, and crew experience.
| Project Type | Estimated Time |
|---|---|
| Small shed or garage | 1–2 days |
| Average residential roof | 2–5 days |
| Complex rooflines | 1 week or longer |
DIY projects usually take longer than professional installations because layout, cutting, and flashing work require precision.
When to Hire a Professional Metal Roofing Contractor
Some roofing projects are better handled by experienced contractors.
Professional installation is usually recommended for:
- Steep roofs
- Complex rooflines
- Skylights and chimneys
- Valley-heavy roof systems
- Standing seam installations
- Structural decking issues
- Large residential roofs
Professional contractors also help reduce warranty issues caused by installation mistakes.
DIY vs Professional Installation
| DIY Installation | Professional Installation |
|---|---|
| Lower upfront cost | Faster installation |
| More time required | Proper flashing and detailing |
| Higher mistake risk | Better leak prevention |
| Limited safety equipment | Warranty protection |
Conclusions: Metal Roof Installation: Key Takeaways
Proper installation is what separates a metal roof that lasts 50 years from one that leaks within five.
Metal roofing can last for decades when installed correctly, but proper installation matters just as much as the roofing material itself.
Most problems develop because of poor flashing, incorrect screw placement, bad overlaps, or missing moisture protection layers.
Understanding the full installation sequence helps homeowners avoid common mistakes and recognize where leaks usually begin.
Mangold Roofing has installed and inspected metal roofs across Texas, helping homeowners get the installation right the first time. Whether you are working with corrugated panels or a standing seam system, attention to detail at every step is what determines long-term performance.
FAQs
Can you install a metal roof yourself?
Yes, some homeowners install metal roofing themselves on simple roof layouts. However, flashing details, screw placement, and panel alignment mistakes can cause leaks later.
What goes under a metal roof?
Most metal roofing systems include roof decking or plywood, underlayment, moisture barriers, and sometimes battens or ventilation systems. The plywood decking provides structural support for fastener holding and panel stability.
Can you install metal roofing over shingles?
Sometimes, yes. Local building codes, roof condition, ventilation, and structural support all affect whether installation over shingles is allowed.
Where do screws go on metal roofing?
Screw placement depends on the roofing panel system. Some systems fasten through flat areas, while others fasten along panel ribs according to the manufacturer’s instructions.
What causes metal roof leaks?
The most common causes include poor flashing installation, incorrect screw placement, damaged washers, improper overlaps, and missing underlayment.
How do you cut metal roofing panels?
Metal roofing panels are typically cut using tin snips for small cuts or a circular saw with a metal-cutting blade for longer straight cuts. Always cut from the underside to avoid damaging the painted surface, and wear eye protection as metal shards are sharp.
Do metal roofs need special underlayment?
Yes. Synthetic underlayment is recommended for metal roofs because it handles heat better than traditional felt paper and resists moisture more effectively. Some metal roof systems also require a specific underlayment type to maintain the manufacturer’s warranty.