The majority of individuals choose metal roofing due to its durability, but this is what most of them do not know: moisture is capable of messing it all up.
Once water finds its way to the bottom, it starts to seep in gradually, making your panels useless, rusting, and ruining your little piece of insulation.
Moisture barrier may not sound like something contractors want to sell to potential customers, but it remains one of the most critical elements of your roof.
And here is how to determine whether you need one and how it protects your home.
What Is a Moisture Barrier for a Metal Roof?
A moisture barrier for metal roofing works alongside roof flashing to prevent water from seeping into vulnerable areas. Imagine it as a raincoat for everything beneath your metal panels.
Metal roof installations normally have this moisture barrier as thick plastic sheeting or other waterproof materials. It lies between your metal roofing and deck or insulation beneath.
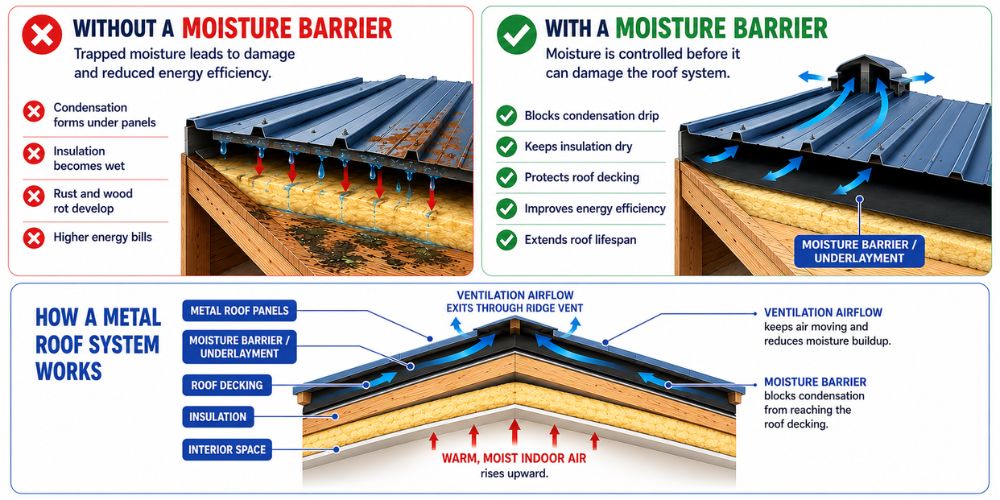
Metal panels cool down quickly, especially at night or during sudden weather shifts. When warmth and humidity from inside your home reach that cold surface, condensation forms, the same way a cold glass sweats on a humid day.
Without a properly installed moisture barrier in place, that condensation sits directly against your roof deck and insulation, and that’s when the lifespan of your roofing materials starts to shrink. Rust damages panels, wood rots, and insulation loses effectiveness.
Why a Moisture Barrier Is Important for Metal Roofing?
Now, let’s look at why a moisture barrier is so important for metal roofs and the hidden damage it helps avoid.
Preventing Condensation and Rust
You know how a cold glass gets water droplets on it? The same thing happens when warm, humid air from your house meets your cold metal roof.
Without a barrier, those droplets just sit there and slowly eat away at your metal panels through rust.
Energy Efficiency and Insulation
Here’s something most people don’t realize: wet insulation is basically worthless.
When moisture sneaks into your under-roof insulation for a metal roof, it gets soggy and stops working.
Your heating and cooling systems have to run overtime to keep your house comfortable, which shows up big time on your energy bills.
A proper barrier keeps insulation under a steel roof dry and effective, helping maintain comfort and efficiency.
Moisture Barrier vs. Vapor Barrier: Are They the Same Thing?
Not exactly, and the terms get mixed up a lot in roofing conversations, including, frankly, in a lot of contractor blogs.
A moisture barrier (also called underlayment) sits directly under your metal panels and blocks bulk water and condensation drip from reaching your deck and insulation. This is what we’re covering in this guide, and it’s what most residential metal roofs need.
A vapor barrier is a separate, perm-rated layer that controls water vapor diffusion through the building envelope; it’s typically placed on the warm side of the insulation, not directly under the metal panels. True vapor barriers are more common in commercial metal buildings, cold climates, or unvented assemblies than in standard residential metal roofing.
Here’s something specific to our area: San Antonio falls under IECC Climate Zone 2, and current building code only requires a vapor retarder on interior frame walls in Climate Zones 5 through 8, zones much colder than ours. For most San Antonio homes, the underlayment described below, combined with proper attic ventilation, handles moisture control without needing a separate vapor barrier layer.
Best Moisture Barrier and Underlayment Options for Metal Roofs
When choosing the best metal roof underlayment, consider how it pairs with your metal roof panels and overall system.
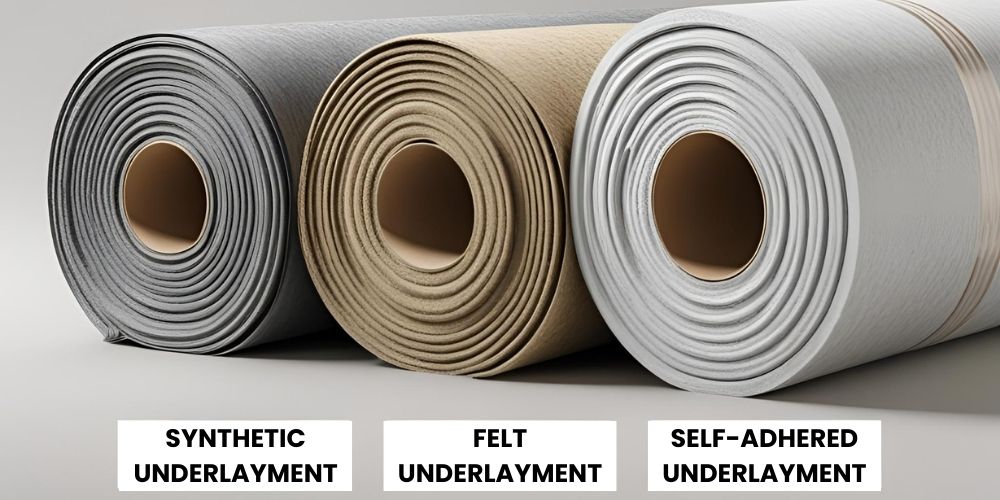
1. Synthetic Underlayment:
This is probably your best bet for most homes. It’s tougher than traditional felt, won’t tear easily during installation, and handles temperature changes like a champ. It also sheds water better than felt if rain hits before your panels go on, and it’s lighter, which makes it easier to work with on steeper roofs. For most residential metal roofs in our area, this is what we recommend as the standard choice.
2. Self-Adhering Membranes:
These are the premium options. They stick directly to your roof deck and create an almost bulletproof seal, since there are no fastener penetrations for water to find its way through. They cost more upfront, but they’re worth it in areas with harsh weather, on low-slope sections of a roof, or anywhere extra protection matters, such as valleys, eaves, around chimneys and vents. We typically use these at the trouble spots, even when synthetic covers the rest of the roof.
3. Traditional Felt Underlayment:
This still works, but it’s becoming less popular. It’s cheaper initially, but it tears more easily during installation, can trap moisture against the deck, and doesn’t hold up as long under the heat cycling metal roofs go through. It’s a reasonable choice for a shed or other low-stakes structure, but we don’t recommend it as the only underlayment for a primary residence.
| Type | Durability | Cost | Best For |
| Synthetic | High | $$ | Most residential metal roofs |
| Self-adhering membrane | Highest | $$$ | Valleys, eaves, low-slope areas, harsh weather |
| Traditional felt | Moderate | $ | Sheds, outbuildings, low-budget projects |
For steel roof underlayment specifically, make sure whatever you choose can handle thermal movement. Metal expands and contracts with temperature changes, so your underlayment needs to flex with it.
When picking roof underlayment for metal roof systems, think about your climate, budget, and how long you plan to stay in your home.
Ventilation: The Other Half of Moisture Control
A moisture barrier isn’t meant to work alone. Proper attic ventilation lets trapped moisture escape before it can condense in the first place; intake vents at the eaves pull in cooler air, while exhaust vents at the ridge let warm, moist air out.
Building code backs this up: most homes need at least one square foot of ventilation area for every 300 square feet of attic space, split between intake and exhaust. Skipping ventilation is one of the most common reasons condensation problems persist even after a barrier is installed.
Even the best moisture barrier cannot solve condensation problems if trapped humid air has nowhere to escape. Proper roof ventilation and moisture control work together, especially in warm, humid climates like South Texas.
How to Install a Moisture Barrier for a Metal Roof
1. Laying Out the Moisture Barrier
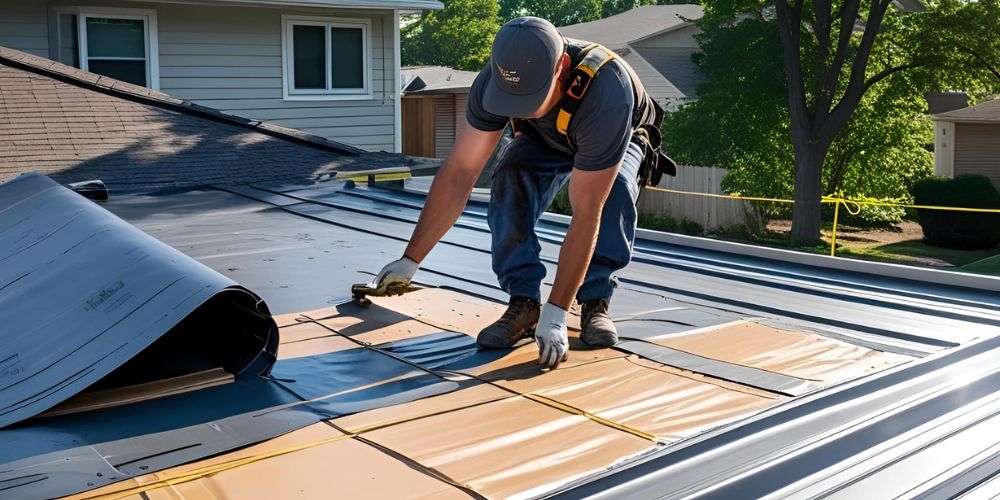
Start at the bottom of your roof and work your way up. Roll out your moisture barrier in horizontal strips, making sure each new row overlaps the one below it by at least 6 inches. That overlap is really important; water has a way of finding even tiny gaps.
2. Fastening It Down
Use roofing nails or staples to hold it down, spacing them about 12 inches apart along the edges. You don’t need to go overboard since your metal panels will go on top anyway.
3. Sealing Vents and Penetrations
The tricky part is around things like vents and chimneys. These spots need extra care because they’re where leaks usually start. Use roofing cement or special waterproof tape made for tin roof waterproofing to seal these areas tightly.
A Mistake to Avoid
Don’t stack multiple impermeable layers on top of each other, like an impermeable interior layer combined with an impermeable underlayment. That combination can trap moisture in between the two instead of letting it escape, which causes the exact problem you’re trying to prevent.
Where Insulation Fits In
To insulate a metal roof properly, place insulation after the moisture barrier and before the panels, especially on flat metal roofs where drainage is more difficult. The moisture barrier goes down first, then your insulation layer, and finally your metal roofing panels on top.
Do All Metal Roofs Need a Moisture Barrier?
Not every metal roof absolutely needs a moisture barrier, but most should have one. It really comes down to where you live and how your roof is built.
If you’re dealing with big temperature changes or lots of humidity, you definitely want one. If insulation lies beneath the metal roof, a barrier is essential to prevent it from becoming soaked and ineffective.
You may skip it in very dry climates, or when covering a shed, but for homes in San Antonio, it’s better to invest in protection like drip edge flashing. But for your actual house? You’ll want that protection almost every time.
Most roofers will tell you to put one in no matter what; it’s cheap insurance that keeps bigger problems from happening down the road.
Conclusion
A moisture barrier under your metal roof is a smart way to prevent hidden damage and rising energy costs while ensuring your system performs like the best metal roofing options.
Get the right barrier installed, and your roof will serve you well for decades.
When you’re ready for reliable work from people who know what they’re doing Mangold Roofing is who homeowners trust to get it done right.
Our team brings years of experience, attention to detail, and a commitment to lasting results. Get in touch with us today to schedule your inspection and discuss your roofing needs.